Want to build a Power Automate flow using Power Automate Co-Pilot in just seconds…, without writing a single line of code? In this tutorial, we’ll walk you through exactly how to use Microsoft’s AI assistant to create powerful workflows with ease.
Whether you’re a beginner or just exploring the future of no-code automation, this guide will get you started.
📚 Want to go deeper? Check out the complete Power Automate course here »
Want to dive deeper into automating workflows? Check out our full Power Automate course here.
🚀 Why Co-Pilot in Power Automate Is a Game-Changer
Microsoft has integrated Co-Pilot AI into Power Automate to help you build flows by just describing what you want. With this approach:
- You save time
- You don’t need to understand technical syntax
- Most of the heavy lifting is done for you
- It’s currently in preview mode, meaning it may not always be perfect, but it can do 80% of the job in most cases. You just need to fine-tune the results and test them before going live.
👉 Watch on YouTube: How to Build Power Automate Flow Using Co-Pilot
Includes real-time fixes, errors, and solutions you won’t want to miss! Don’t want to read entire blog.. No Problem. Here is the step by step tutorial available on youtube.
🛠 Step-by-Step: Build a Flow Using Co-Pilot
Let’s look at the real use case from the video:
✅ Goal: Send a Microsoft Teams message when a new Microsoft Forms response is submitted and the rating is less than 3.
🔹 Step 0: Create Microsoft Forms in the same environment with following fields.
- Customer Name
- Email Address
- Ratings
- Customer Feedback
🔹 Step 1: Start From Power Automate Home
You can either start from the homepage prompt or choose Create → Describe it to design it. You will land up on the page which is shown below.

🔹 Step 2: Enter a Prompt we typed:
Prompt : “Create a flow that sends a message to Microsoft Teams when a new response is submitted in Microsoft Forms and the rating is less than three.”
Click Generate and Co-Pilot starts building the flow.
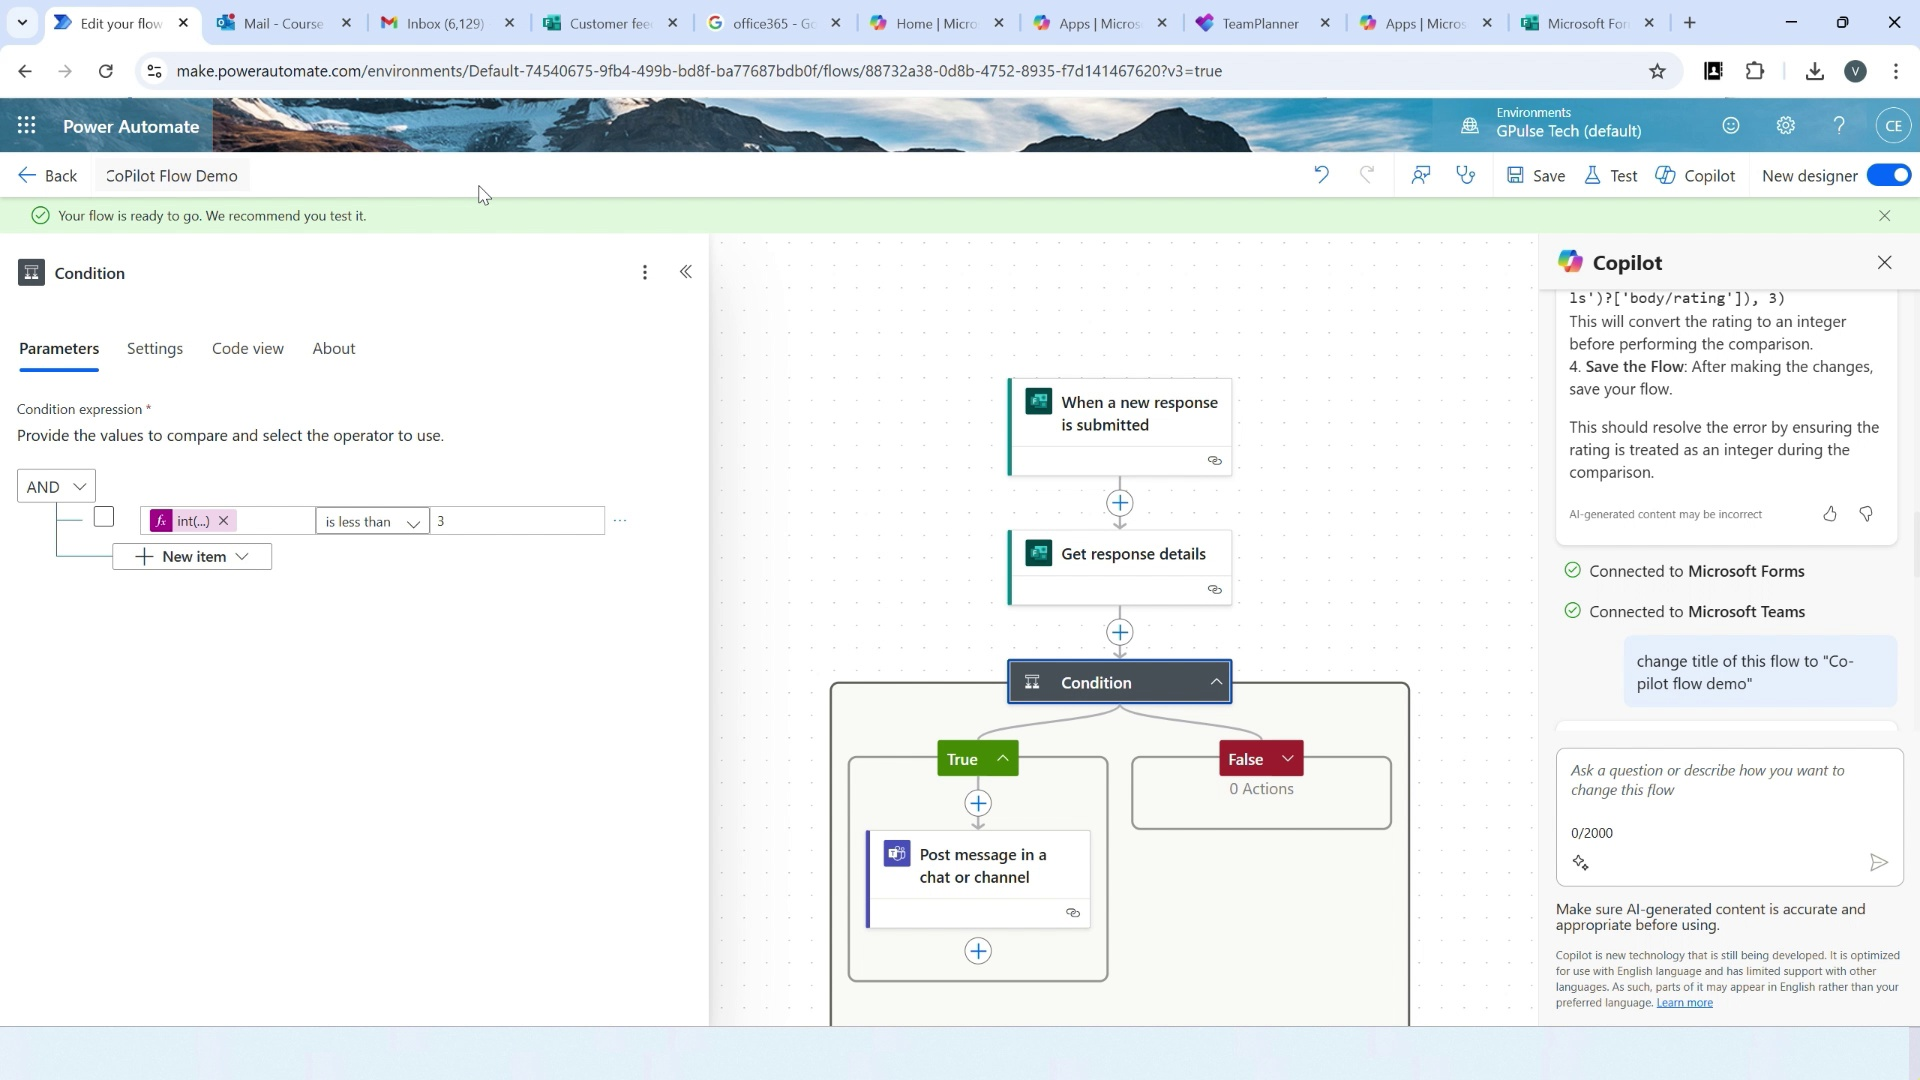
🔹 Step 3: Review the Suggested Flow The generated flow included:
- Trigger: When a form response is submitted
- Action: Get response details
- Condition: If rating is less than 3
- Output: Send message to Teams

🔹 Step 4: It will display connection with Microsoft Forms and Microsoft Teams channel.
If not yet connected then connect with these. You will see a green icon once sucessfully connected . Now click on Create Flow.

⚠️ Common Issues You Might Face (And Fixes)
Flow will be created but with some erros. Not bad! But there were a few things we had to fix manually.
❌ Error: Invalid Parameter
The AI couldn’t automatically select the form as shown below. We manually selected: Customer Feedback Form

❌ Condition Type Mismatch
The condition compared a string value to an integer. We had to typecast the field properly using an expression: plaintext Copy

int(triggerOutputs()?[‘body/rating’]). This code should be in the dynamic parameter. Just remove this code from Designer and embed condition field from Dynamic field again.
❌ Missing Teams’r Receipent
The AI forgot to set the recipient in the “Post a message” action. We manually added the target and adjusted the message.
✅ Final Result: Power Automate Flow Created with Co-Pilot
Once corrected, we submitted a test form with a low rating and—bam! 💥
The Microsoft Teams message was triggered as expected.
You can view the execution results in Power Automate run history, where:
Green ✅ means success
Red ❌ means something failed (in which case, fix & re-test)
💡 Key Takeaways
Co-Pilot helps create flows fast, but still needs human review.It’s ideal for simple workflows and can be expanded manually.
This approach saves time and reduces learning curve for beginners.
🎓 Learn More: Power Automate Full Course
Want to go beyond basic flows? Learn to build advanced logic, connectors, real-world business automations, and error handling in my full Power Automate course.
👉 Click below to enroll now
🧠 Bonus Tips for Beginners
- Always test your flow before publishing
- Use expression builder when Co-Pilot’s default logic falls short
- Make sure all services (Forms, Teams, etc.) are properly connected